UDF and Table Editors
These customization editors enable users to define and manage UDFs and tables directly within the software.
Identifying the Edit Button
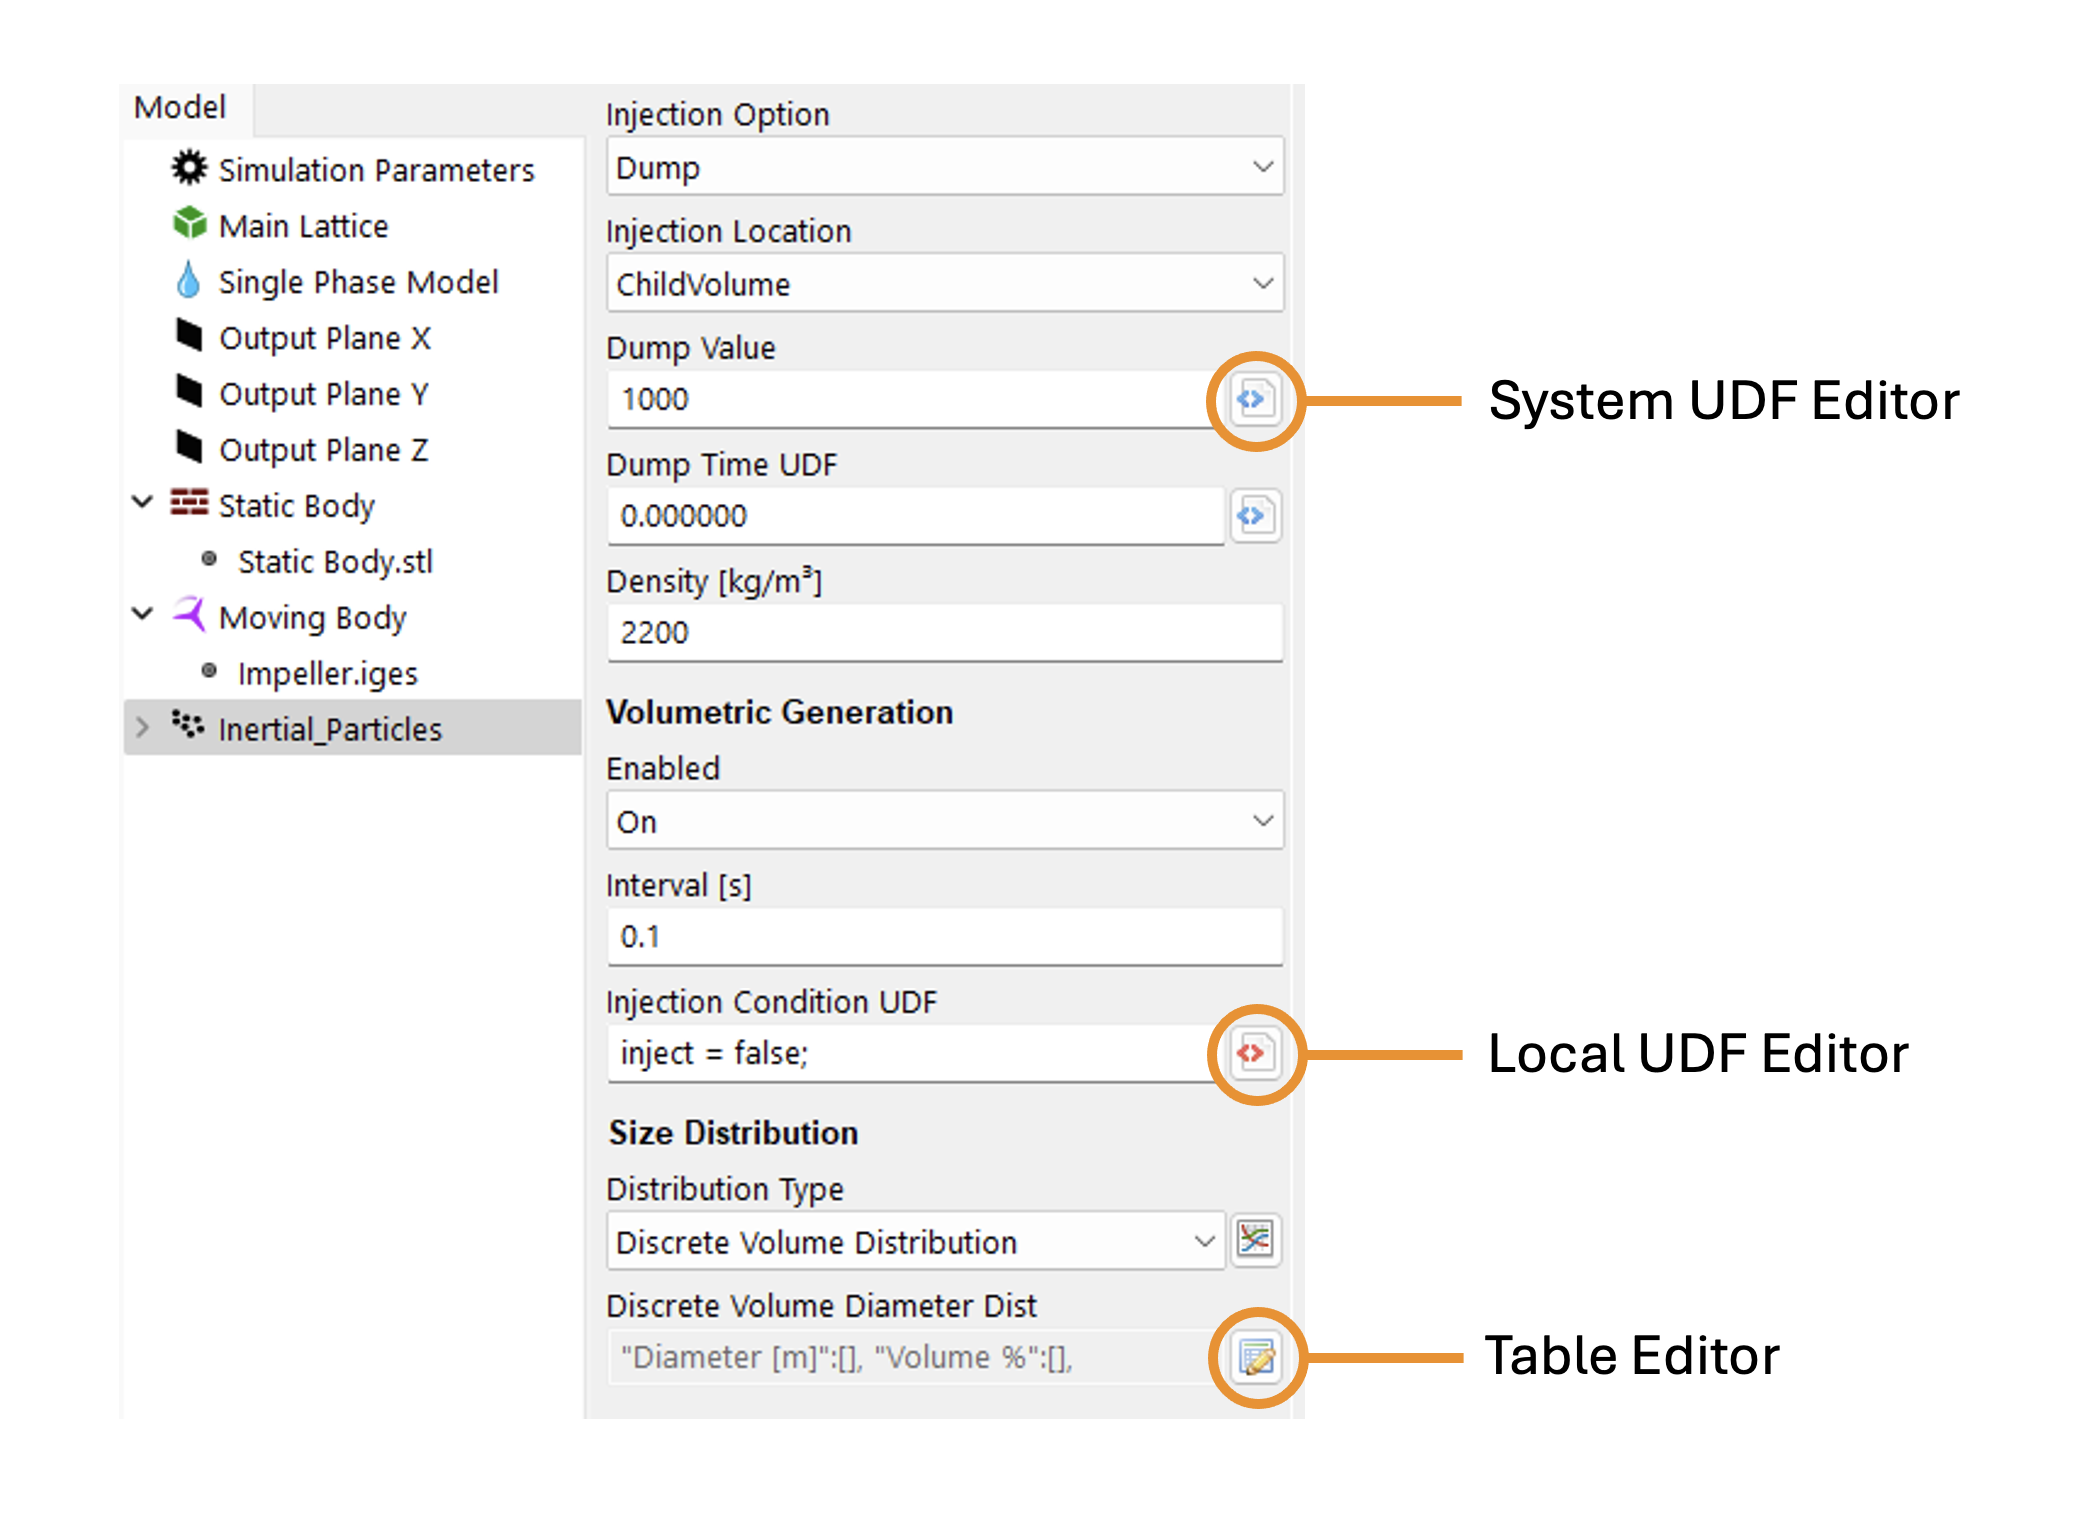
There is an edit button next to the customizable selections and parameters, as indicated in the figure below. Clicking this button launches the appropriate editor (i.e., System UDF Editor, Local UDF Editor, and Table Editor).
Not all settings and selections can be customized via runtime UDFs or custom tables; however, these settings can be adjusted between simulations using parameter sweeps.
UDF Editor
The UDF Editor is opened by pressing the red edit button ( ) for Local UDFS, or the blue edit button (
 ) for System UDFs, as illustrated below.
Components
The components of the UDF Editor are presented below. This example shows a Rotation Speed UDF.
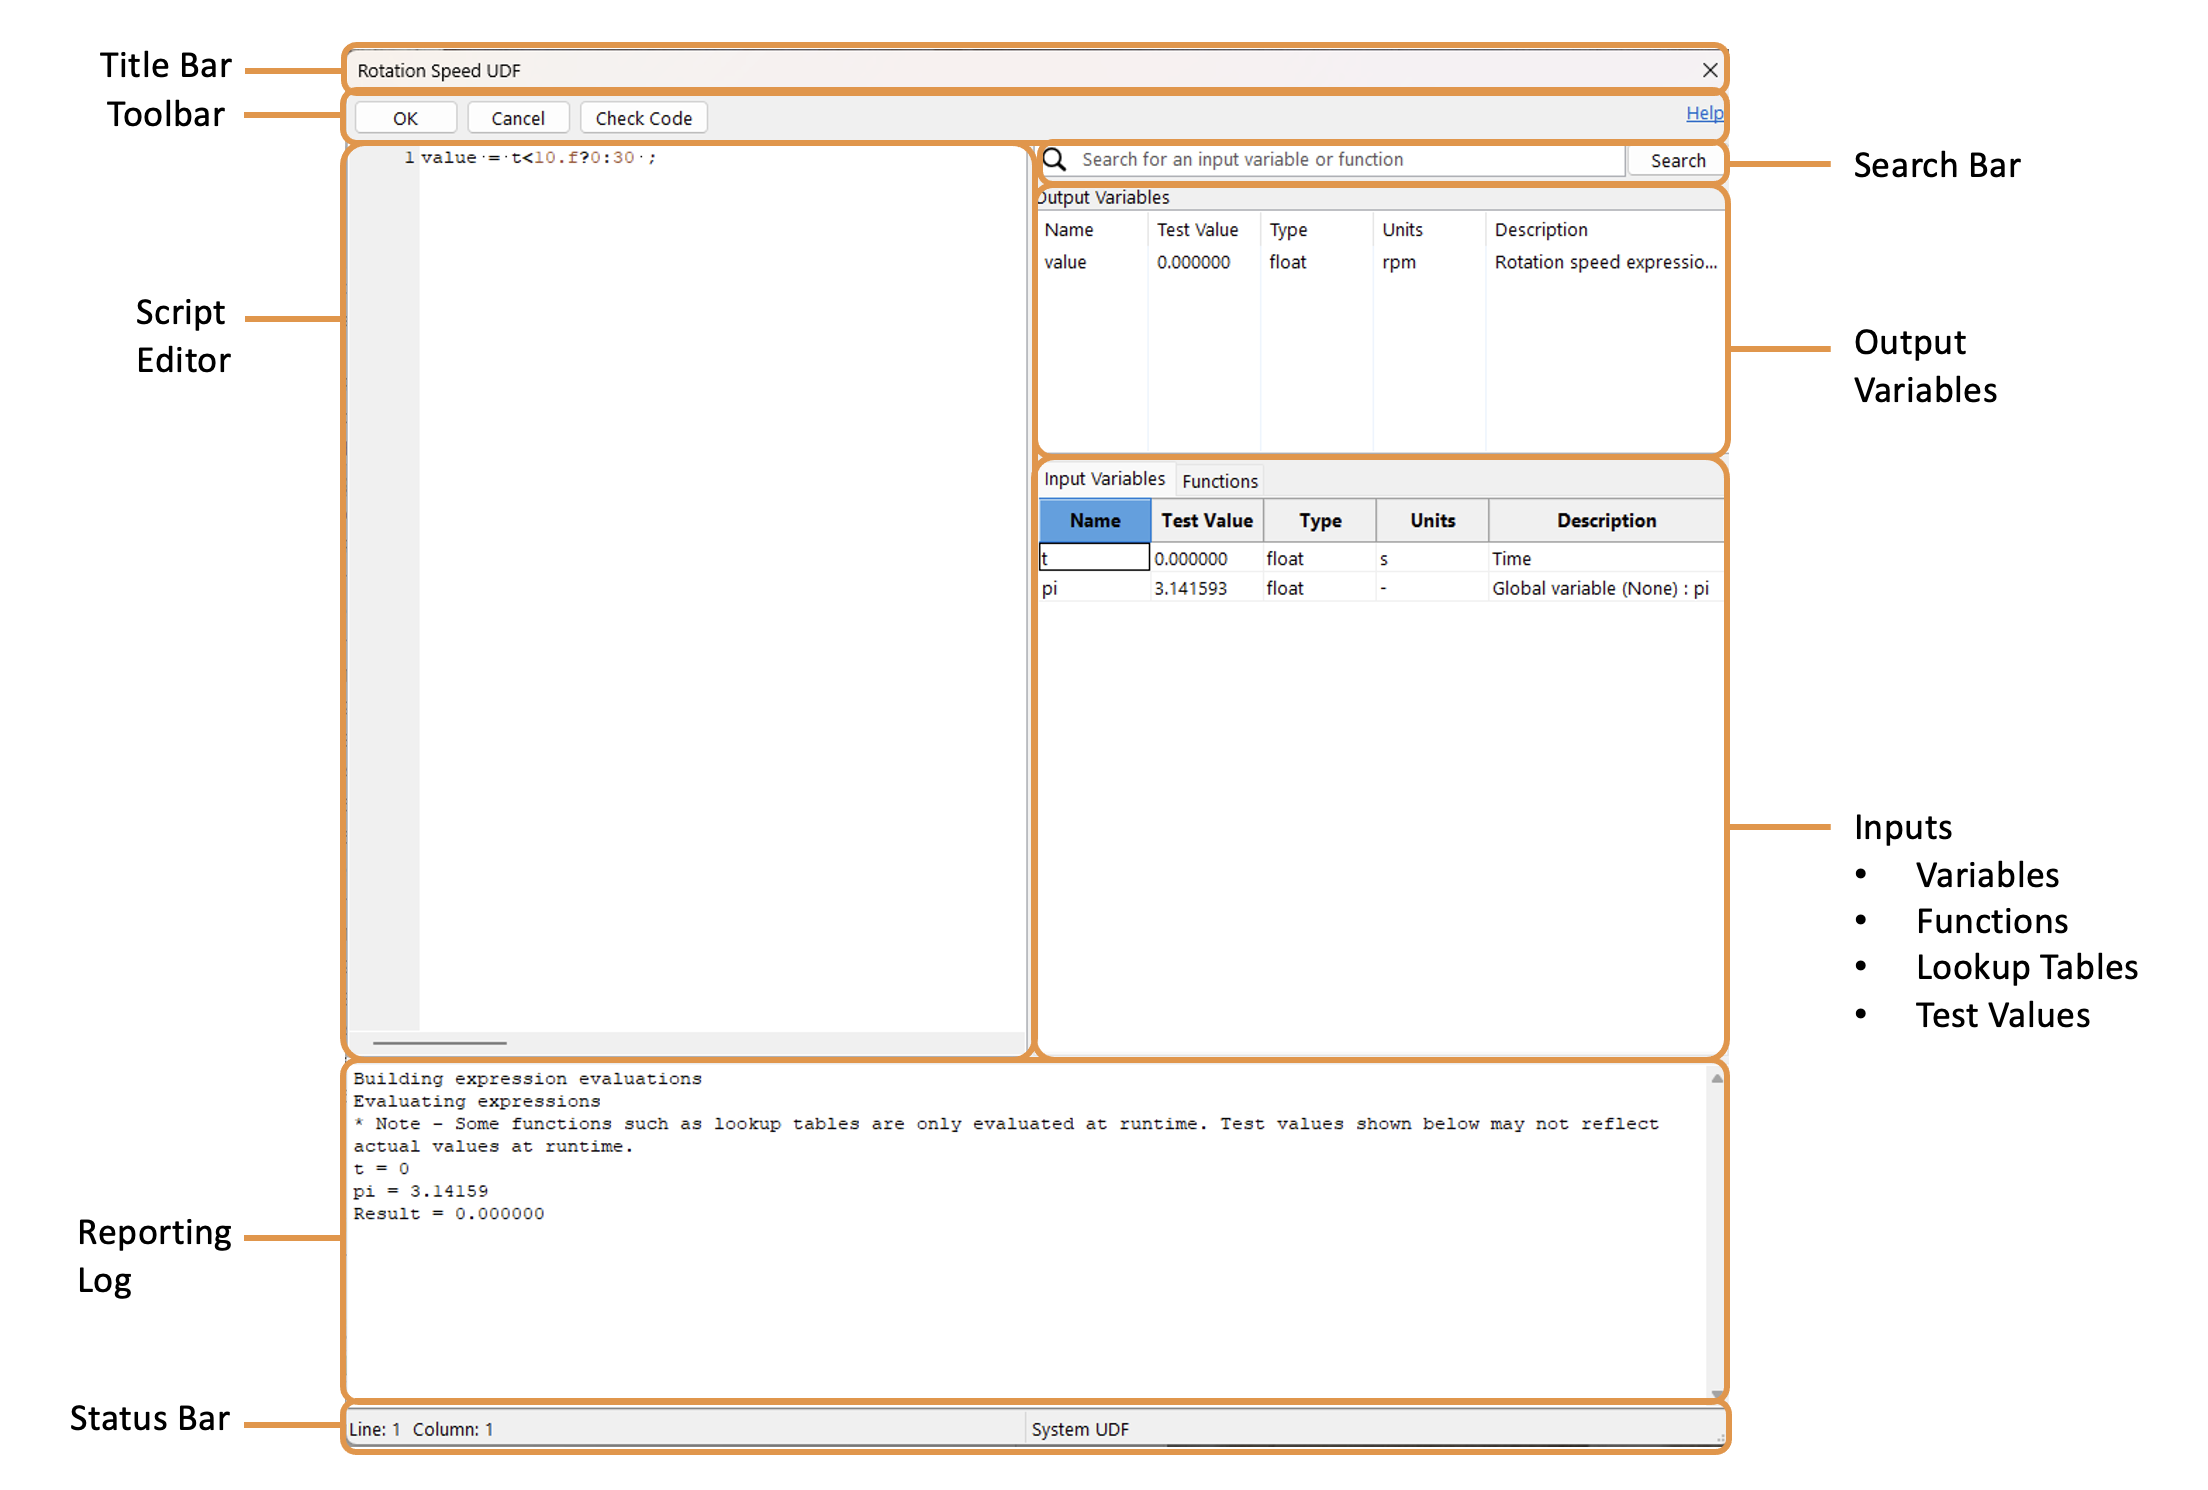
Title Bar: This indicates the property currently being edited in the UDF Editor.
Toolbar: These action buttons are used to close the editor and perform a syntax/output check on the UDF. OK saves the code script and closes the form. Cancel closes the form without saving the code script. Check Code performs a syntax check on the UDF script and computes the output based on the test values provided. The result of this syntax check, as well as the output values, are viewed in the Reporting Log.
Script Editor: This field is where the UDF script is entered. System variable expressions are written in the C programing language. All predefined input variables, user-defined lookup tables, and built-in math functions available for use in the script are listed in the UDF Input Variables panel.
Reporting Log: This panel reports the results of the syntax check (Check Code). If no syntax error is detected, the log will report the output value, as calculated using the input variable test values. If syntax error is detected, the error type and location will be listed. These errors must be corrected for the UDF to execute.
Status Bar: This panel identifies the cursor location within the Script Editor. It also confirms that the property specified in the Title Bar is a System (or Local) UDF.
Search Bar: This field is to search for an input variable or function. Press enter to execute the search.
Output Variables: This is the variable that the UDF is expected to return. The Name of the output variable for System UDFs is always “value”. The Name of the output variable for Local UDFs depends on which property is being edited. Description elaborates how this value will be used at runtime, and Type defines the variable data. Test Value is the output of the Check Code command, which evaluates the UDF using the test values defined in the Input Variables panel. All variables listed in the Output Variables panel must be assigned a value with the UDF script.
Inputs: These are the variables, built-in functions, custom functions, and user lookup tables that can be evoked when writing the UDF. In the Input Variables tab, Name lists the names of the input variables that can be evoked in the UDF. Test Values lists the sample input variable values that will be used by the Check Code command to evaluate the output variables. Functions are grouped by type, including look-up tables, built-in math function, and custom function.
Note
The values specified in the Test Values column are only used within the UDF editor as part of the Check Code. These test values are not saved and are not evoked at runtime.
Two-Column Table Editor
The Two-Column Table Editor is opened by pressing the edit button ( ) as illustrated below. This example shows the Discrete Diameter Distribution Table.
Components
The components of the Two-Column table editor are presented below. This example shows the Discrete Diameter Distribution Table.
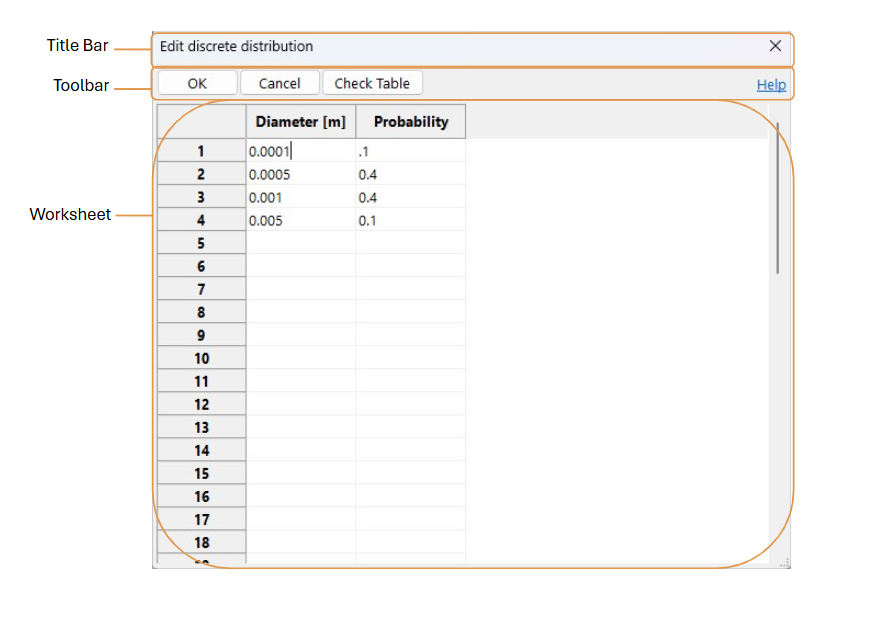
- Title Bar
This indicates that the table editor is a Lookup Table.
- Toolbar
These action buttons are used to close the editor and perform a check on the data in the table.
- OK
This button saves the table data and closes the form.
- Cancel
This button closes the form without saving the table data.
- Check Table
This button performs a check on the table data, looking for incomplete data pairs or non-numeric entries.
- Help
This clickable link launches the relevant documentation page.
- Worksheet
This sheet is where the pair-wise data are specified. The physical parameters associated with each column are listed in the column headers. All data entered into the worksheet must be written in either standard decimal or E-notation.
Note
Right-click on the worksheet to copy, paste, and delete individual cells or groups of highlighted cells. In Windows operating systems, Control-C and Control-V shortcut keys also work to copy and paste worksheet data.
Multi-Column Table Editor
The Multi-Column Table editor is opened by pressing the edit button () as illustrated below. In this example, the Discrete Superquadrics Distribution Table Editor is used to define a discrete particle size distribution.
Components
The components of the Multi Column table editor are presented below. This example shows Discrete Superquadrics Distribution Table.
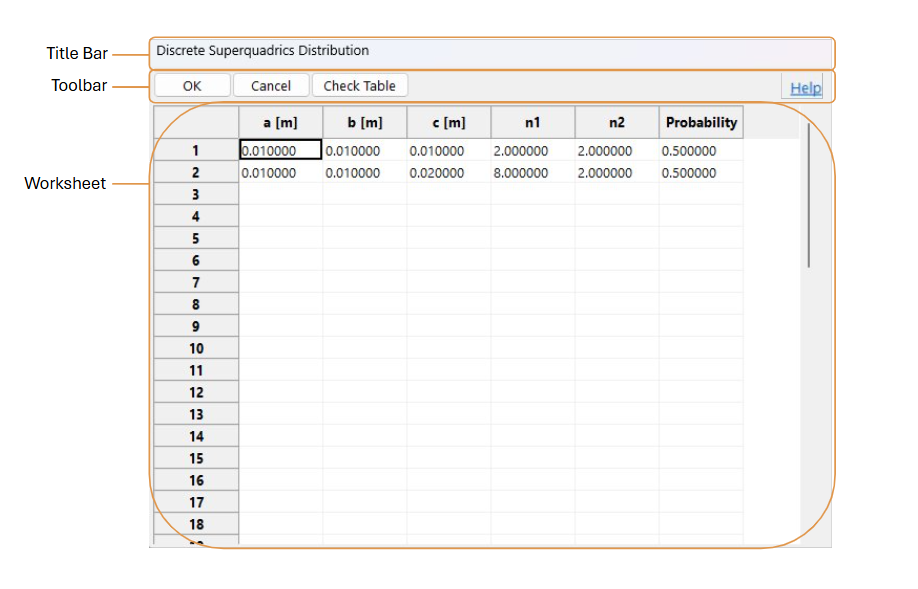
- Title Bar
This indicates that the table editor is a Lookup Table.
- Toolbar
These action buttons are used to close the editor and perform a check on the data in the table.
- OK
This button saves the table data and closes the form.
- Cancel
This button closes the form without saving the table data.
- Check Table
This button performs a check on the table data, looking for incomplete data pairs or non-numeric entries.
- Help
This clickable link launches the relevant documentation page.
- Worksheet
This sheet is where the ordered tuples data are specified. The physical parameters associated with each column are listed in the column headers. All data entered into the worksheet must be written in either standard decimal or E-notation.
Note
Right-click on the worksheet to copy, paste, and delete individual cells or groups of highlighted cells. In Windows operating systems, Control-C and Control-V shortcut keys also work to copy and paste worksheet data.